A STARTING POINT FOR YOUR NEXT IDEA
From the source
to your wrist.
Pick a path into the project. The repositories are the source of truth for the current hardware and firmware; this guide helps you find the right one.
Start with the design.
The watch combines an ESP32-S3, external memory, motion sensing, a round touch display, audio and haptics. Open the schematic and the mechanical files to understand how those pieces fit together.
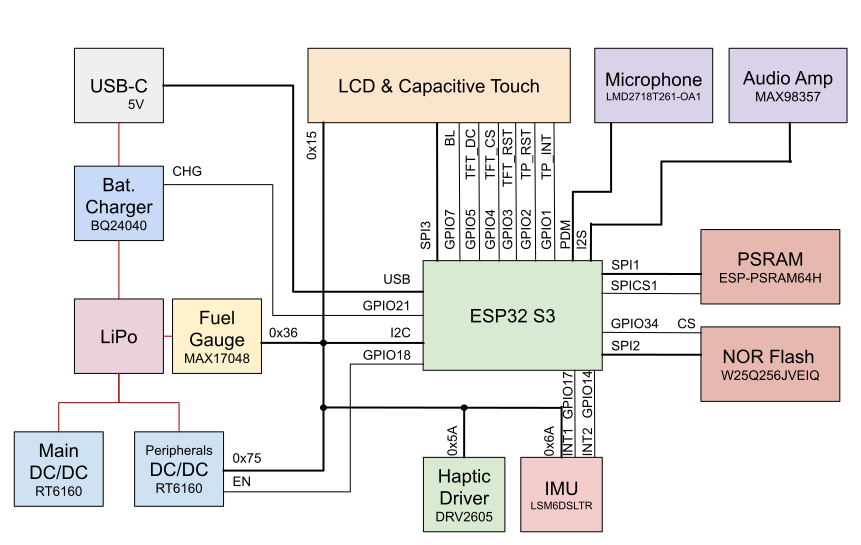
Use the schematic for your board revision and the overlay or pin configuration for your selected firmware. The project’s block diagram and individual firmware examples can use different bus labels.
Choose a firmware path.
These are separate implementations. Choose the environment that matches your experiment, then read its setup instructions and current feature support.
The NuttX port lives in a separate repository with submodules. Follow that port’s README when cloning and building it.
Give your first app one job.
Begin with the existing display example and get a visible result. Then add one input or behaviour at a time.
- Say hello. Build the selected firmware and confirm that the display and input paths work.
- Show a value. Read the IMU counter or battery gauge, then update a label.
- Make it interactive. Add touch behaviour, a watchface complication or an application state.
- Connect it. Explore the Arduino BLE time-sync example, or design a GATT interface for your own application.
For local machine learning, a small TensorFlow Lite Micro wake-word detector has already run on Hacktor Watch. Use that as a starting point for thinking about audio buffers, model working memory and listening time.
Build. Observe. Adjust.
Follow your stack’s build and flash instructions for the actual board. Once the application runs, check the whole experience: sensor updates, display work, wireless behaviour and power use.
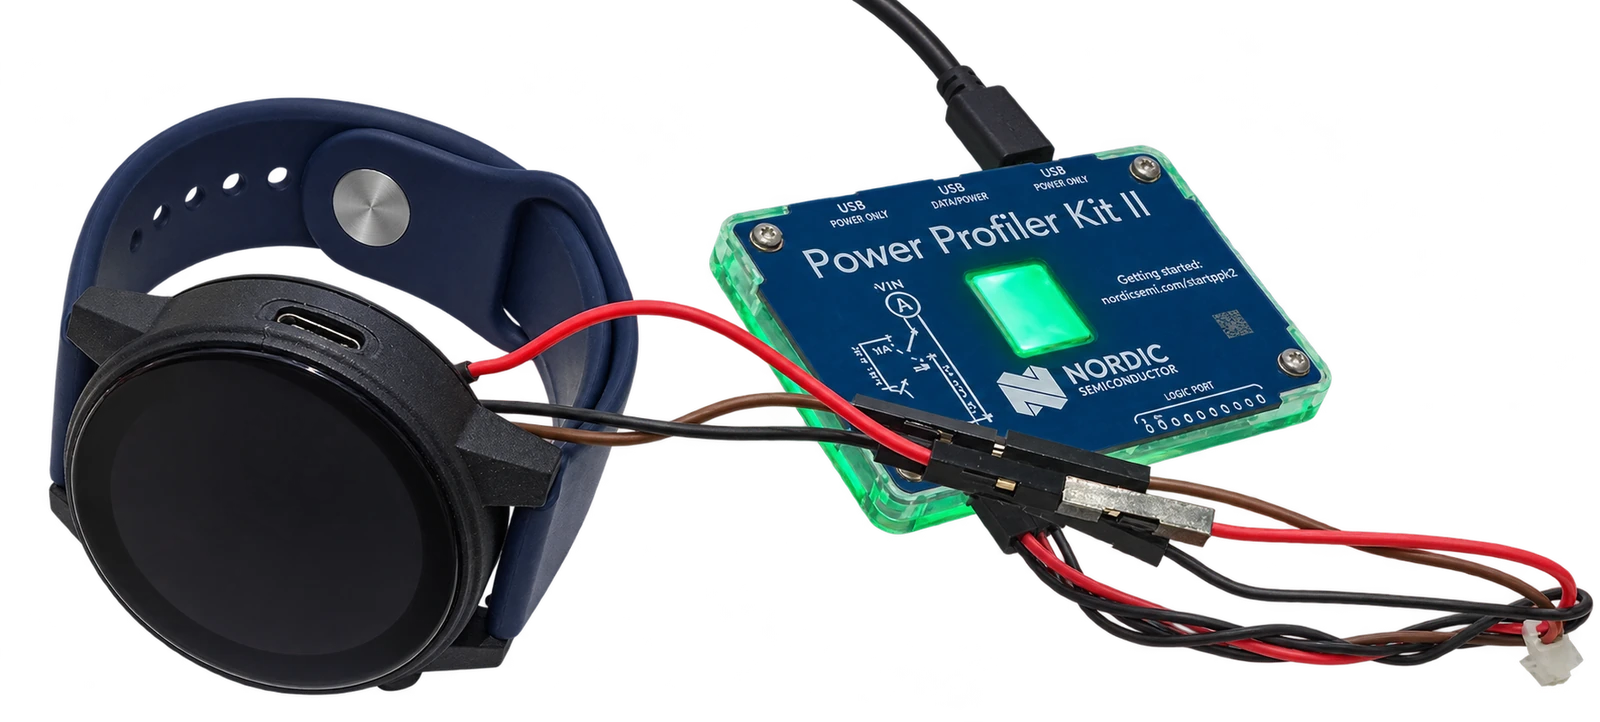
Keep notes about your hardware revision, firmware version and workload. A configured timer interval is a software choice; measured response time and energy use come from testing the device.
Share what you learn.
Found an issue, improved a driver or made an interesting application? Share the relevant details with the project so another developer can reproduce the result.
For PCB or developer-kit enquiries, email contact@hacktorwatch.com. Tell us what you’d like to build; an enquiry does not place an order or take a payment.